Making a New Ship & Single Player Scenario from Scratch
in 49 Easy Steps (and 236 substeps)
This tutorial will show you how to make a completely new ship
and place it in a simple single player scenario.
You should have already completed the first tutorial before
trying this one; several important concepts are more explicitly
illustrated there.
The ship will have an unusual beam weapon (which will behave
somewhat similarly to the Audemedon carrier's beam weapon) and
an unusual missile weapon.
The single player scenario will simply consist of two ships.
Whichever ship survives wins. The scenario will also have a short
briefing.
1. Launch Hera
2. From the File menu, select Open...
3. Navigate to the Hera stationery folder. Open the "Factory
Blessed Objects" stationery; this stationery includes the
factory versions of the four required "blessed" objects
4. Hera will prompt you to save the file (it needs to make
a working copy of your new scenario file based on the stationery
you opened); choose a location and name the file "Tutorial
2"
5. A new Main Window will appear, titled "Hera: Factory
Four Blessed Objects"
A. In the Title text field, enter "Tutorial 2"
B. In the Version field, enter "1.0.0"
C. In the Author field, enter your name
D.You can leave the two URL fields as they are
6. You are now going to copy a single ship from the factory
scenario
A. Bring the factory Main Window, titled "Hera: Ares"
to the front. Click on the Edit Objects button in that window
B. Bring the Main Window for the file you just created, titled
"Hera: Factory Four Blessed Objects," to the front.
Click on the Edit Objects button in that window
C. Click on the Object Editor window for the factory scenarios,
titled "Factory Scenarios: Choose Object"
D. Click on the Sort By pop up menu and select Class if it's
not already selected
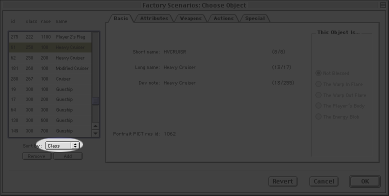 |
| the sort by pop-up |
E. Scroll up or down until you find the Ishiman "Heavy
Cruiser" object with an I.D. of 61, a class of 250, and
a race of 100
F Select Copy from the Edit menu.
G. Bring the Object Editor window for your new scenario file,
titled "Tutorial 2: Edit Objects," to the front.
H. Click on the object list to the left. It must have the
focus (be highlighted with an outline).
I. Select Paste from the Edit menu. The heavy cruiser object
and all of its associated objects get pasted in to the object
list
7. You're done with the Factory's Object Editor; bring that
window, titled "Factory Scenarios: Choose Object" to
the front and close it by clicking OK
8. We're now going to begin working on the totally new ship;
we'll start by duplicating the heavy cruiser; select the heavy
cruiser in the Object Editor of your new scenario -- sort the
list by class and find the object with a class of 250
9 Once you've selected the heavy cruiser, click the Add button
beneath the object list; this will duplicate the cruiser
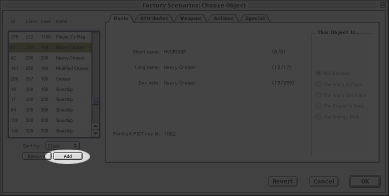 |
| the add button duplicates the currently selected object |
10. Click the Basic tab and enter the following values:
Short name: BTTLSHIP
Long name: Battleship
Dev note: ship for tutorial
Portrait PICT res id: -1
11. Click the Attributes tab, and enter the following values;
if a value isn't listed below, don't change it
class: 510
race: 1200
offense: 4.5
target: 7
max vel: 2.0
(click the "Calc Now" button beneath the warp our
field)
velocity: 1.0
price: 4500
mass: 2.5
thrust: .050
health: 8000
skill n: 18
shield: gold
scale: 8192
LR size: 8
LR shape: diamond
friend: 2.0
danger: -20.0
build ratio: .087
built time: 6000
12. We're going to skip the Weapons and Actions tabs for now;
click the Special Tab, then click the Choose Sprite button
A. The Sprite Selector window will appear, showing the sprite
for the Ishiman heavy cruiser; we're going to import a new sprite
for this battleship
B. Click the Add... button below the sprite list; a standard
Open dialog box will appear
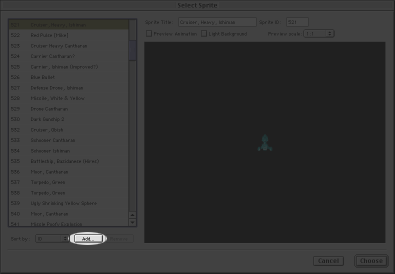 |
| the add button in the Sprite Selector allows you to import new sprites |
C. Navigate to the Tutorial Media folder (included with Hera)
and open the file titled "tutorial ship@8.pict"; the
Open dialog will close and the Sprite Importer will appear
D. Enter 9 in the "# of columns" field, and 36 in
the "total # of cells" field
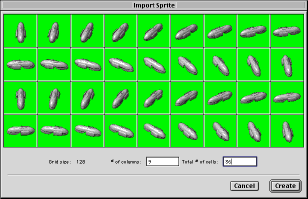 |
| the Sprite Importer should look like this before you click Create |
E. Click the Create button; the Sprite Importer will close
F. You'll be back at the Sprite Selector window; enter "Tutorial
Ship" in the Sprite Title field; the I.D. should be 531
E. Click choose; the Sprite Selector will close
13. You should be back in the the Object Editor, looking at
the Special tab for the battleship you're making; enter these
values:
Shape offset: 0
Rotation resolution: 10
Max turn rate: 0.5
Turn acceleration: 0.5
14. You will now create two new weapons that the new ship will
use; we'll start by creating the shots for each of those two weapons;
scroll through the object list, find the P-K Beam object and select
it
15. One of the two weapons will shoot beams; selecting an already
existing beam saves you a few steps; click the Add button at the
bottom of the object list to duplicate the selected P-K Beam object
16. Click the Basic tab and enter the following values:
Short name: QGRVBEAM
Long name :Quantum Grav Beam
Dev note: Quantum Gravity Beam for tutorial ship
17. Click the Attributes tab and change the Age field from
"25" to "10"
18. Click the Special tab (we'll come back to the Actions tab
after this step) and set the following values:
Color: Red
Kind: Static Object to Relative Coordinate
Accuracy: 200
Range: 900
19. Click the Actions Tab; click the Edit... button on the
same line as the Create Sequence check box; the Action Editor
will appear
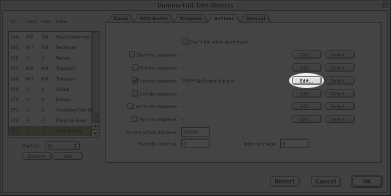 |
| this Edit... button is for the object's create sequence |
A. The current sequence, which gets executed every time an
object of this type gets created, plays a single sound effect;
you are going to duplicate this sequence and change the sound
effect of the duplicate; click the Add Sequence button at the
bottom of the Sequences list
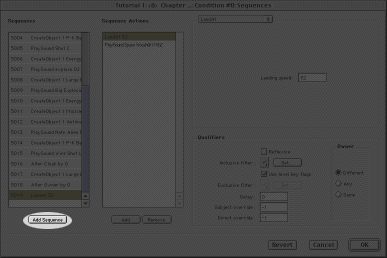 |
| clicking Add Sequence duplicates the currently selected sequence -- often you'll simply want to delete the actions in the duplicated sequence, but not in this case |
B. Click the Choose... button on the same line as the Sound
Resource ID field; this will open the Sound Selector
1. Click the Add... button below the Sound list; this will
open a standard open file dialog box
2. In the file dialog, navigate to the Tutorial Media folder,
choose the "tutorial sound.snd" file, and click Open;
the file dialog will close
3. Click the Play Sound button to hear the sound;
4. Click Choose; the Sound Selector will close
C. You should be looking at the Action Editor; click the OK
button to select your new action which plays the sound effect
you imported; the Action Editor will close
20. You just created a shot -- something that gets produced
by a weapon; you will now create the weapon that uses that shot;
select the "Rapid P-K Cannon" from the object list
21. Click the Add button to duplicate the Rapid P-K Cannon
weapon; it will be the basis for the new"Quantum Grav Cannon"
22. Click the Basic tab; enter:
Short name: QGRVBEAM
Long name: Quant Grav Cannon
Dev note: Beam weapon for tutorial ship
23. Click the Attributes tab; turn the "Auto Target"
option on in the Attr flags pop up menu
24. Click the Actions tab; click the Edit... button on the
same line as the checked Activate Sequence check box; the Action
Editor will open
A. Click the Add Sequence button to duplicate the selected
sequence
B. Click the Select... button on the same line as the Which
base type field; another Object Editor window will open
1. Find the Quantum Grav Beam object you previously created
(you might try sorting by name); select it
2. Click OK in the Object Editor
C. You should now be looking at the Action Editor; Click OK
to select your new action sequence
25. You should be back at the Object Editor; click the Special
Panel; make the following changes:
Usage: make sure both the "Use For Attacking" and
"Use for Defense" options are checked
Energy cost: 2
Fire time: 10
Range: 810000 (don't click Calculate Range Now)
26. You just created an entirely new weapon; now you'll create
another, beginning with its shots; select the C Missile object
in the object list; click the "Add" button to duplicate
it
27. Click the Basic tab and enter:
Short name: BMISSILE
Long name: Baker Missile
Dev note: missile for tutorial ship
28. Click the Attributes tab and change the following:
Attr flags: check the "CanBeEngaged" and "OccupiesSpace"
flags (leave all other flags as they are)
Velocity: 3.0
Mass: 0.796
Thrust: 0.101
Health: 100
Energy: 600
Shield: Gold
29. Click the Weapons tab; unlike any other missile in Ares,
this missile will itself be able to shoot
A. Click the Beam checkbox; another Object Editor window will
open, titled "Tutorial 2: Baker Missile: Beam Weapon: Choose
Object"
B. Select the Quant Grav Cannon object; click OK
30. We'll leave the actions as they are for this missile; click
the Special tab and enter these values:
Shape offset: 0
Rotation resolution: 10
Max turn rate: .101
Turn acceleration: .101
31. Click the Choose Sprite button
A. The Sprite Selector window will appear, showing the sprite
for the standard missile
B. Click the Add... button below the sprite list; a standard
Open dialog box will appear
C. Navigate to the Tutorial Media folder (included with Hera)
and open the file titled "tutorial missile@8.pict";
the Open dialog will close and the Sprite Importer will appear
D. Enter 9 in the "# of columns" field, and 36 in
the "total # of cells" field
E. Click the Create button; the Sprite Importer will close
F. You'll be back at the Sprite Selector window; enter "Tutorial
Missile" in the Sprite Title field; the I.D. should be 574
E. Click choose; the Sprite Selector will close
32. Now you'll create the weapon that shoots this new missile;
select the object titled "C Missiles(5)" -- this is
a weapon that shoots standard missiles, used by the Ishiman heavy
cruiser; it will be the basis for our new missile shooter
33. Click the Add button to duplicate the missile launcher
34. Click the Basic tab and enter:
Short name: BMISSILE
Long name: B Missile Launch
Dev note: missile launcher for tutorial ship
35. Click the Actions tab; click the Edit button on the same
line as the Activate sequence check box; the Action Editor will
open
A. Click the Add Sequence button to duplicate the currently
selected sequence
B. Click the Select... button on the same line as the Which
base type field; a new Object Editor will open
1. Select the Baker Missile object
2. Click OK; the new Object Editor will close
C. Back in the Action Editor, click OK
36. Click the Special tab in the Object Editor and enter these
values:
Fire time: 32
Ammo: 50
Click the Calculate Range Now button
Click the Calculate Inverse Speed Now button
Restock cost: 64
37. You've now created two new unique weapons; now you'll equip
the battle ship with them; select the battleship object in the
Object list
A. Click the Weapons tab
B. Click the Beam choose button beneath the Beam field; a
new Object Editor window will open, showing only the weapon objects
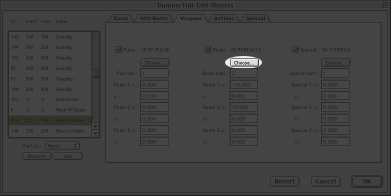 |
| each weapon slot has its own Choose... button; this one is for the beam weapon (although the weapon needn't be beam related at all) |
1. Select the Quant Grav Cannon object
2. Click OK; the new Object Editor window will close
C. Back in the original Object Editor, click the choose button
beneath the Special field; a new Object Editor window will again
open
1. Select the B Missile Launch object
2. Click OK; the new Object Editor will close
D. Again in the Object Editor, Uncheck the pulse checkbox
38. You've now created all the new object that will be used
in this tutorial, five in all: the battle ship, the Quantum Gravity
Beams, the Quantum Gravity Beam Cannon, the Baker Missile, and
the Baker Missile Launcher; click the OK button in the Object
Editor to close it
39. Way back in step 11, you entered 1200 as the race for the
battleship -- that race doesn't exist yet; let's enter it now;
click Edit Races in the Main Window; the Race Editor will open
A. Scroll down in the Race list until you find "Unused
Race 1;" select it
B. Enter the following values:
Singular: Baker
Plural: Bakers
Military Name: Baker's Fleet
Home World: Baker's World
ID: 1200
Apparent Color: Gray
Illegal Colors: check gray
Advantage: 1.0
C. That's it; click the OK button to close the Race Editor
40. You'll now create the scenario; click the Edit Scenarios
button in the Main Window; the Scenario Editor will open
41. In the Scenarios Editor, click the Add button; Enter the
following values in the Scenario Data box:
Number of players: 2
Chapter name: \i Chapter 1 [space, return] \iTutorial Level
Par ratio: 1.0
Par kills: 1
Par losses: 0
Par time: 60
Start time: 0
Song ID: -1
42. Make sure Player 1 Settings is selected in the Player Settings
pop-up menu
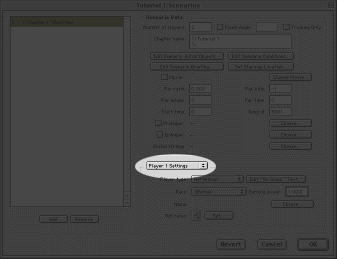 |
| the Player Settings pop-up determines to which player the values below apply |
A. Enter the following values:
Player type: Single human
Race: Ishiman
Earning power: 1.0
Net races: make sure no races are checked
B. Click the Edit "No Ships" Text... button; the
TEXT Editor will open
1. Change the text to read "The battleship has defeated
you."
2. Click OK
C. Click the Choose... button on the same line as the Name
field; the STR# Editor will open
1. Select STR# 4200 "Player Names"
2. Select string 1 in the String list, "The Human/Ishiman
Cooperative"
3. Click Choose; the STR# Editor will close
43. Now select Player 2 Settings in the Player Settings pop-up
menu of the Scenario Editor
A. Enter the following values:
Player type: Computer
Race: Baker
Earning power: 1.0
Net races: make sure no races are checked
B. Note that you don't have to click the Edit "No Ships"
Text... button -- that's only needed for human and net players
C. Click the Choose... button on the same line as the Name
field; the STR# Editor will open
1. Select STR# 4200 "Player Names"
2. Select the last item in the String list, 9 "The Free
Worlds of Obain"
3. Click the Add String button; string 9 will be duplicated
4. Enter Baker's Fleet
5. Click Choose; the STR# Editor will close
44. In the Scenario Editor, click the Edit Scenario Initial
Objects... button; the Initial Editor will open
A. Click the Add button in the Initial Editor
B. Check the "IsPlayerShip" flag in the Attributes
pop-up menu
C. Click the Choose... button on the Object line; an Object
Editor window will open
1. Select the Heavy Cruiser object, class 250; it may help
to sort by class
2. Click the OK button
D. Back in the Initial Editor leave all the fields the same
except the Owner field, in which you should enter 0
E. Click the Add button; the Heavy Cruiser will be duplicated
F. Uncheck the "IsPlayerShip" flag in the Attributes
pop-up menu
G. Click the Choose... button on the same line as the Object
field; an Object Editor will open
1. Select the Battleship object you created earlier, class
510
2. Click the OK button
H. Change the following fields:
Owner: 1
LocationX: 0
LocationY: -8000
I. Click the OK button; the Initial Editor will close
45. Now that you've made the initial objects, you can make
the conditions and briefings which may depend on them; back in
the Scenario Editor, click the Edit Scenario Conditions... button;
the Condition Editor will open
A. This scenario will have a single condition; if the computer
controlled ship is destroyed, the human player will win; click
the Add button at the bottom of the Condition List
B. Select Destruction from the Condition pop-up menu
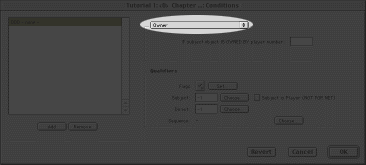 |
| select the Destruction condition with the Condition pop-up menu |
C. Enter 1 in the initial object number field; this corresponds
to the enemy battle ship
D. Click the Choose... button on the same line as the Sequence
field; the Action Editor will open
1. An arbitrary sequence will be selected; click Add Sequence
to duplicate it
2. Delete all of the actions in the actions list of the duplicate
sequence by clicking the Remove button beneath the Sequence Actions
list
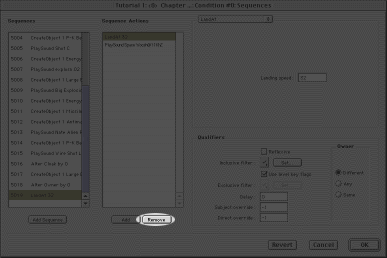 |
| you don't want any of the actions you duplicated -- remove them all by repeatedly clicking the Remove button |
3. After you've deleted the last action, click Add to create
a new, empty action in the Sequence Actions list
4. Select the Declare Winner action from the action pop-up
menu
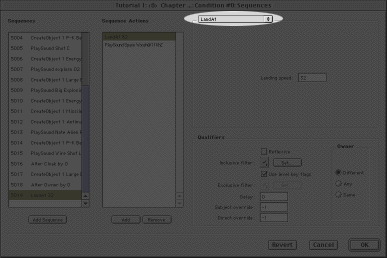 |
| select the Declare Winner action from the Action pop-up menu |
5. Enter the following values:
Which player: 0
Next level: -1
6. Click the Select... button on the same line as the Result
'TEXT' resource ID field; the TEXT Editor will open
a. Click the Add button
b. Tab to the Title field; enter "Tutorial 2: Human wins"
c. Tab to the ID field; enter 6510
d. In the main text area, enter "You destroyed the battleship!"
e. Click the Choose button; the TEXT Editor will close
7. Make sure the following values are set correctly in the
Qualifiers box of the Action Editor:
Reflexive should NOT be checked
No flags in the inclusive filter should be checked
Use level key flags should NOT be checked
Delay should be 0
Subject and Direct Override should be -1
Owner should be any
8. Click the OK button; the Action Editor will close
E. Back in the Condition Editor, click the OK button; the
Condition Editor will close
46. In the Scenario Editor, click the Edit Scenario Briefing...
button; the Briefing Editor will open
A. Click the Add button; a new briefing point will be created
B. In the Briefing Point Type pop-up menu, select Object
C. Click the Choose Object button; the Initial Editor will
open
1. Select the object 000, the player's Heavy Cruiser, in the
Initial Object list
2. Click the OK button; the Initial Object Editor will close
D. In the Briefing Editor, click the Choose Title button;
the STR# Editor will open
1. Click the Add button beneath the STR# list; a new empty
list of strings will be created
2. Tab to the Title field and enter "Tutorial 2 Briefing
Titles"
3. Tab to the ID field and enter "6510"
4. Click the Add String button
5. In the String field, enter "Your Heavy Cruiser"
6. Click the Add String button again; the string you just
entered will be duplicated
7. Replace the duplicated string with "The Enemy Battleship"
8. Select the first string, "Your Heavy Cruiser,"
in the String list
9. Click Choose; the STR# Editor will close
E. In the Briefing Editor, click the Choose Content button;
the TEXT Editor will open
1. Click the Add button
2. Tab to the Title field and enter "Tutorial 2: Brief
1: Heavy Cruiser"
3. Tab to the ID field and enter "6520"
4. In the main text area, enter "This is your heavy cruiser.
Use it to attack and destroy the enemy battleship."
5. Click Choose; the TEXT Editor will close
F. Back in the Briefing Editor, click the Add button; the
first briefing point will be duplicated
G. Click the Choose Object button; the Initial Editor will
open
1. Select the object 001, the enemy's Battleship, in the Initial
Object list
2. Click the OK button; the Initial Object Editor will close
H. In the Briefing Editor, click the Choose Title button;
the STR# Editor will open
1. The String list you created previously will already be
selected; choose the second item in the String list, "The
Enemy Battleship"
2. Click the Choose button; the STR# Editor will close
I. In the Briefing Editor, click the Choose Content button;
the TEXT Editor will open
1. Click the Add button
2. Tab to the Title field and enter "Tutorial 2: Brief
2: Battleship"
3. Tab to the ID field and enter "6525"
4. In the main text area, enter "This is the enemy battleship.
Destroy it at all costs."
5. Click Choose; the TEXT Editor will close
J. In the Briefing Editor, click OK; the Briefing Editor will
close
47. In the Scenario Editor, click OK. the Scenario Editor will
close
48. Bring the Main Window for this scenario to the front if
it isn't already, and choose Save from the file menu
49. You're done! To play the new scenario, quit Hera and drag
the file you created titled "Tutorial 2" on top of the
Ares application icon.


